
In this post I describe how to deploy an ASP.NET Core app that has been dockerized and host it on a Linux machine with SSL enabled for free. This is all possible using Traefik, a reverse proxy and load balancer and its integration with Let’s Encrypt.
On Reflection
In my previous post, whilst it still holds true, I had to break it down into 3 blog posts. It was rather long. Also, it wasn’t very straight forward. I also wanted it to be easily repeatable so that if I wanted to launch another potential project, I could do it with ease. There were just too many touch points and I’ll be honest, it did take a while to get it working.
In my other post, I described getting started with Traefik. This was by far, a much easier and forgiving method. There is a bit of a learning curve, but with Traefik’s online documentation and a healthy online community, there is plenty of support. Also, everything is handled and configured by Traefik.
This is when I started to investigate if Traefik was a good subsitute. With a bit of research and a practical example, I discovered it was possible and much easier. Hence this blog post to share my learnings.
Overview
- Configure and Launch Traefik with SSL enabled.
- Deploy a dockerized ASP.NET Core app.
GitHub Code
As with all my examples, feel free to jump into the code. You can find it my GitHub repo
Also, even though my example is using a dockerized dotnet core app, it can be easily replaced with an alternative dockerized web app of your choice.
Prerequisites
- Linux machine with Docker and Docker Compose installed.
- Some basic understanding of Docker - my docker for beginners may help.
- A docker image hosted in a container repository - see my post here.
- A domain name. This is required as Let’s Encrypt only issue certificates against real domain names.
In the all the steps below, I am working in a directory called /usr/local/deploy. But feel free to create a directory of your choice.
If you are new to Traefik, feel free to visit my post on getting started with Traefik for a quick intro.
Step 1 - Create a login for Traefik’s Dashboard
Traefik offers a dashboard out of the box which is a handy visual element of the backend services it routes. By default it is accesible via port 8080 with no authentication. Fortunately, Traefik offers Basic Authentication and we can use this to add authentication to Traefik’s dashboard to add some privacy. In order to do this, we need to use the htpasswd tool to generate a username and password.
Create a username and password for Traefik’s dashboard using htpasswd
- Check if you have
htpasswdinstalled by typinghtpasswdin the terminal.
htpasswd
- If you don’t have
htpasswdinstalled, it can be installed by running the following command:
sudo apt install apache2-utils
- To create a login for a username such as
adminand a secure password withboar-pun-care-trapping. Then, the command to create a username and password would be:
htpasswd -nb admin boar-pun-care-trapping
It will then output something like this:
admin:$apr1$utgBkEIc$wRnM2PE8e97y3/eSU985b0
Make a note of this, as we will use it later in Traefik’s configuration file in the next step.
Step 2 - Create Traefik’s TOML File
Traefik configuration files are in TOML format. You can find out more from the TOML Github repository.
Create a file called traefik.toml in a directory of your choice.
nano traefik.toml
logLevel = "INFO"

defaultEntryPoints = ["http", "https"]

[entryPoints]
  [entryPoints.dashboard]
  address = ":8081"
    [entryPoints.dashboard.auth]
      [entryPoints.dashboard.auth.basic]
      users = ["admin:$apr1$utgBkEIc$wRnM2PE8e97y3/eSU985b0"]
  [entryPoints.http]
   address = ":80"
    [entryPoints.http.redirect]
    entryPoint = "https"
  [entryPoints.https]
    address = ":443"
     [entryPoints.https.tls]


[api]
entrypoint="dashboard"
dashboard=true

[acme]
email = "your-email@email.com"
storage = "acme.json"
entryPoint = "https"
onHostRule = true
[acme.httpChallenge]
entryPoint = "http"

[docker]
domain = "yourdomain.com"
watch = true
network = "traefik_network"
There are 4 parts to this configuration file.
[api]- This is Traefik’s dashboard configuration section. I have given it an entrypoint name and enabled it. Notice the namedashboard. This is used again in theentryPointssection which I will explain next.[entryPoints]- Tells Traefik how to handle networking entry points. These are commonly http and https. You will notice that there is a section calledentryPoints.dashboard. As we have defined the namedashboardin the[api]section, we can reference the name here. The entry points here define the 80 and 443 ports for SSL.[acme]- This is used by Traefik to setup free SSL certificates using LetsEncrypt. We will cover this in a moment.[docker]- This tells Traefik to use docker and watch for any new containers launched.
Changes to make:
- Line 11, this is where you can insert your basic http authentication credentials as defined in step 1.
- Line 26, change this to your preferred email address. This has to be a valid one. This is so that Let’s Encrypt can email you when the certificate is about to expire. But don’t worry, Traefik will help with the renewals.
- Line 34, change this to your root domain.
Step 3 - Create an acme.json file
In the same directory of where the traefik.toml file is created, create an empty file called acme.json. This is used by Treafik so that it can create SSL certificates automatically with Let’s Encrypt. All we have to do is setup the file.
touch acme.json
For security reasons, we need to lock down permissions so that only the owner of the file has read and write permissions.
chmod 600 acme.json
Step 4 - Create a Docker Compose file for Traefik
Now that we have created the toml configuration file and the acme.json file for SSL certificates, we need to create a docker compose file to pull Traefik’s container and also apply volume mappings.
Create a file such as docker-compose-traefik.yml
nano docker-compose-traefik.yml
Below is the Docker Compose file.
version: '3.5'

services:
  reverse-proxy:
    image: traefik:1.7.9 # The official Traefik docker image
    container_name: traefik
    ports:
      - "80:80"     # The HTTP port
      - "443:443"
    volumes:
      - /var/run/docker.sock:/var/run/docker.sock #So that Traefik can listen to the Docker events
      - /usr/local/deploy/traefik.toml:/traefik.toml
      - /usr/local/deploy/acme.json:/acme.json
    networks:
      - web
    labels:
      - traefik.frontend.rule=Host:dashboard.yourdomain.com # the subdomain for the dashboard
      - traefik.port=8081
networks:
  web:
    name: traefik_network
Modify the following:
- Line 13-14 - in steps 2 and 3, we created
traefik.tomlandacme.jsonfile in directory/usr/local/deploy. Be sure to change these lines so that they map to the relevant directory of where you saved these files. - Line 18 - you can provide a subdomain for Traefik’s dashboard. I’m using
dashboard.yourdomain.com, but you are free to choose something more suitable. Be sure that you have a CNAME record in your DNS entries as well. If you are unsure about DNS entries, You can refer to Configuring DNS and CAA section below.
Step 5 - Launch Traefik
Now it’s time to start the Traefik container.
docker-compose -f /usr/local/deploy/docker-compose-traefik.yml up -d
Be sure to modify the path to where your docker-compose-traefik.yml is located as it may differ.
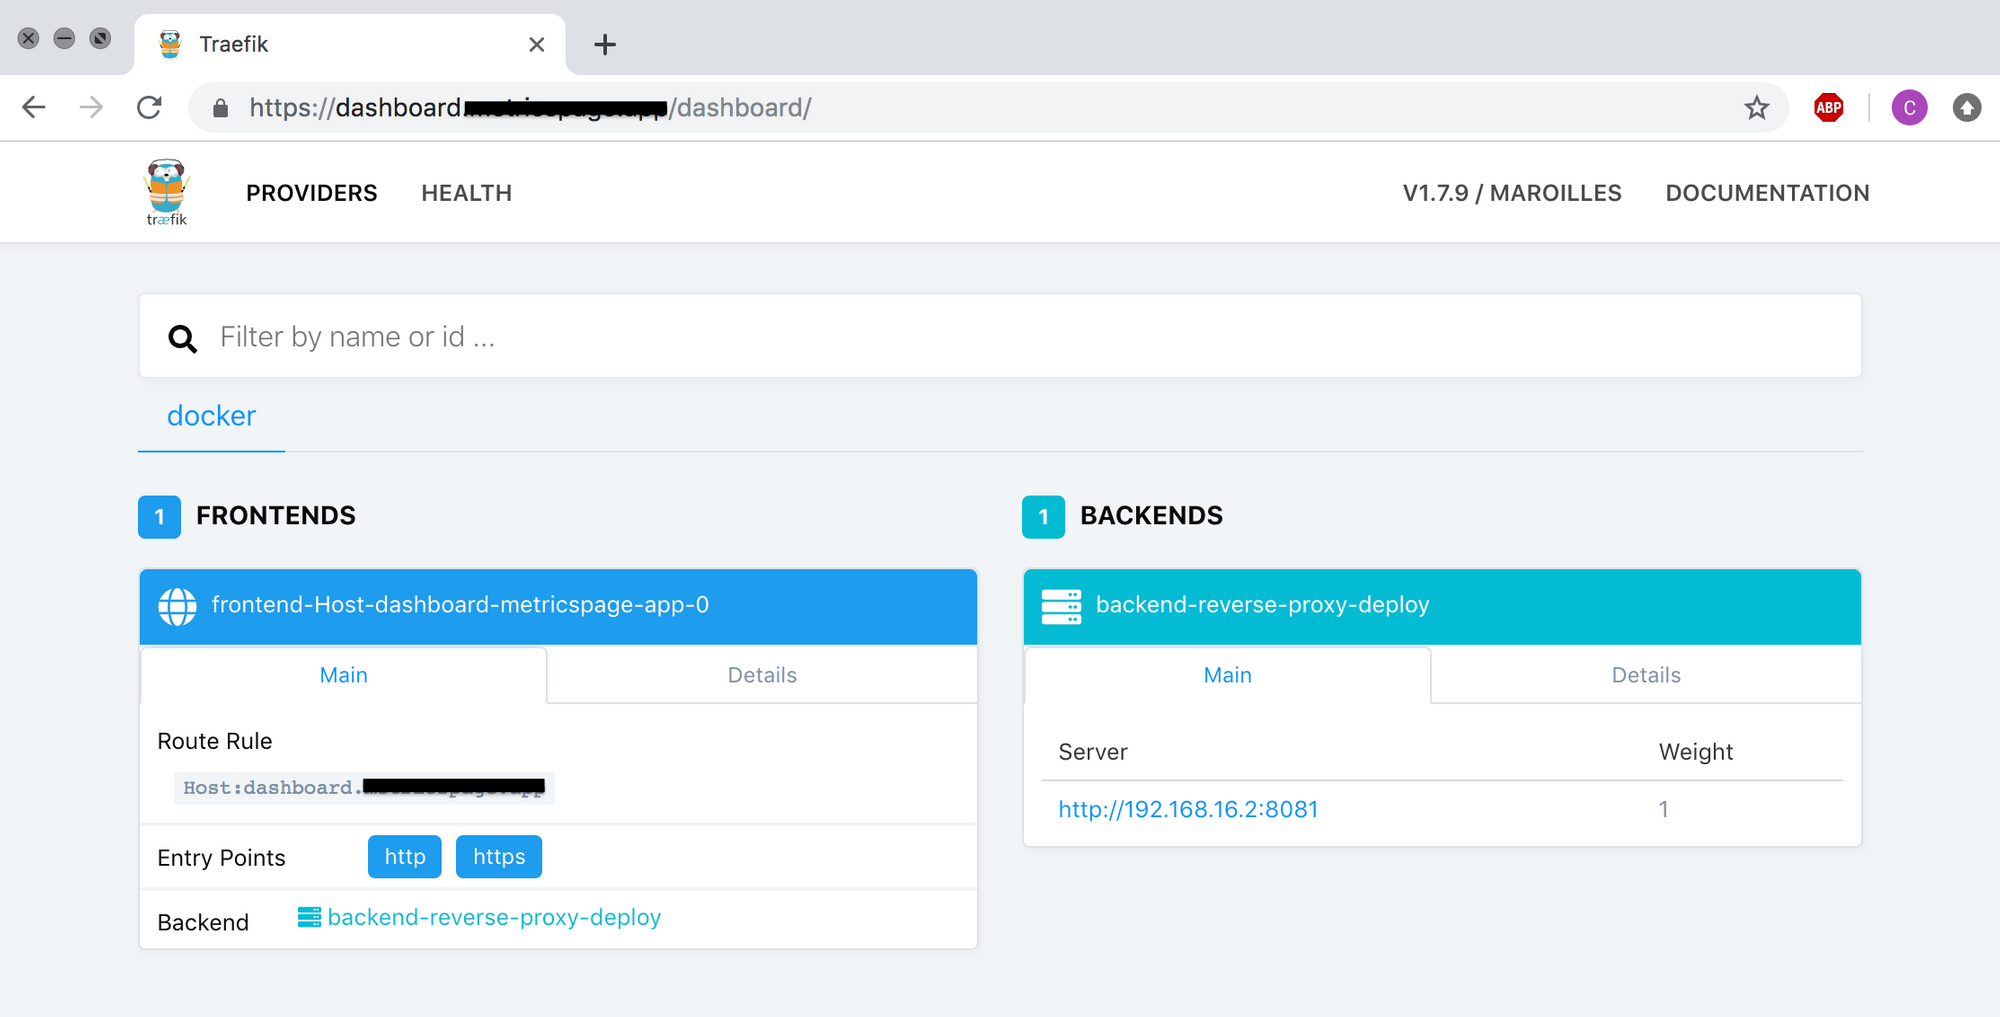
If all goes well, if you visit https://dashboard.yourdomain.com, you should be prompted with basic authentication. Enter the username and password defined in step 1, and on success, Traefik’s dashboard should be shown:
Step 6 - Deploy an ASP.NET Core App
Now that we have Traefik up and running with SSL. Let’s add an ASP.NET Core web app.
Create a Docker Compose file for an ASP.NET web app
Create a file such as docker-compose-web.yml
nano docker-compose-web.yml
Use the following as a template below.
version: "3.5"

services:
  aspnet_demo:
    image: microsoft/dotnet-samples:aspnetapp
    container_name: aspnetcore_sample
    networks:
     - web
    labels:
      - traefik.docker.network=traefik_network
      - traefik.backend=aspnetdemoweb
      - traefik.frontend.rule=Host:aspnetdemo.yourdomain.com
      - traefik.enable=true
      - traefik.port=80 # the port of the container

networks:
  web:
    name: traefik_network
If you notice, we are utilising the labels section in the docker compose file. These labels are Traefik specific and tells Traefik how to configure this particular docker image. For a full list possible labels visit Traefik’s documentation on containers.
Modifications required:
- Line 6 - I’m using Microsoft’s sample Docker image here, but you can replace it with your own image.
- Line 12 - I’ve named the backend as
aspnetdemoweb. This is just a label for Traefik and it can be anything you want. - Line 13 - I have set mine to
aspnetdemo.yourdomain.com. Be sure to change what suits you. Again, ensure that the CNAME or subdomain has been setup up. I have added a section below about Configuring and CAA which may be of help.
Now, start the container.
docker-compose -f /usr/local/deploy/docker-compose-web.yml up -d
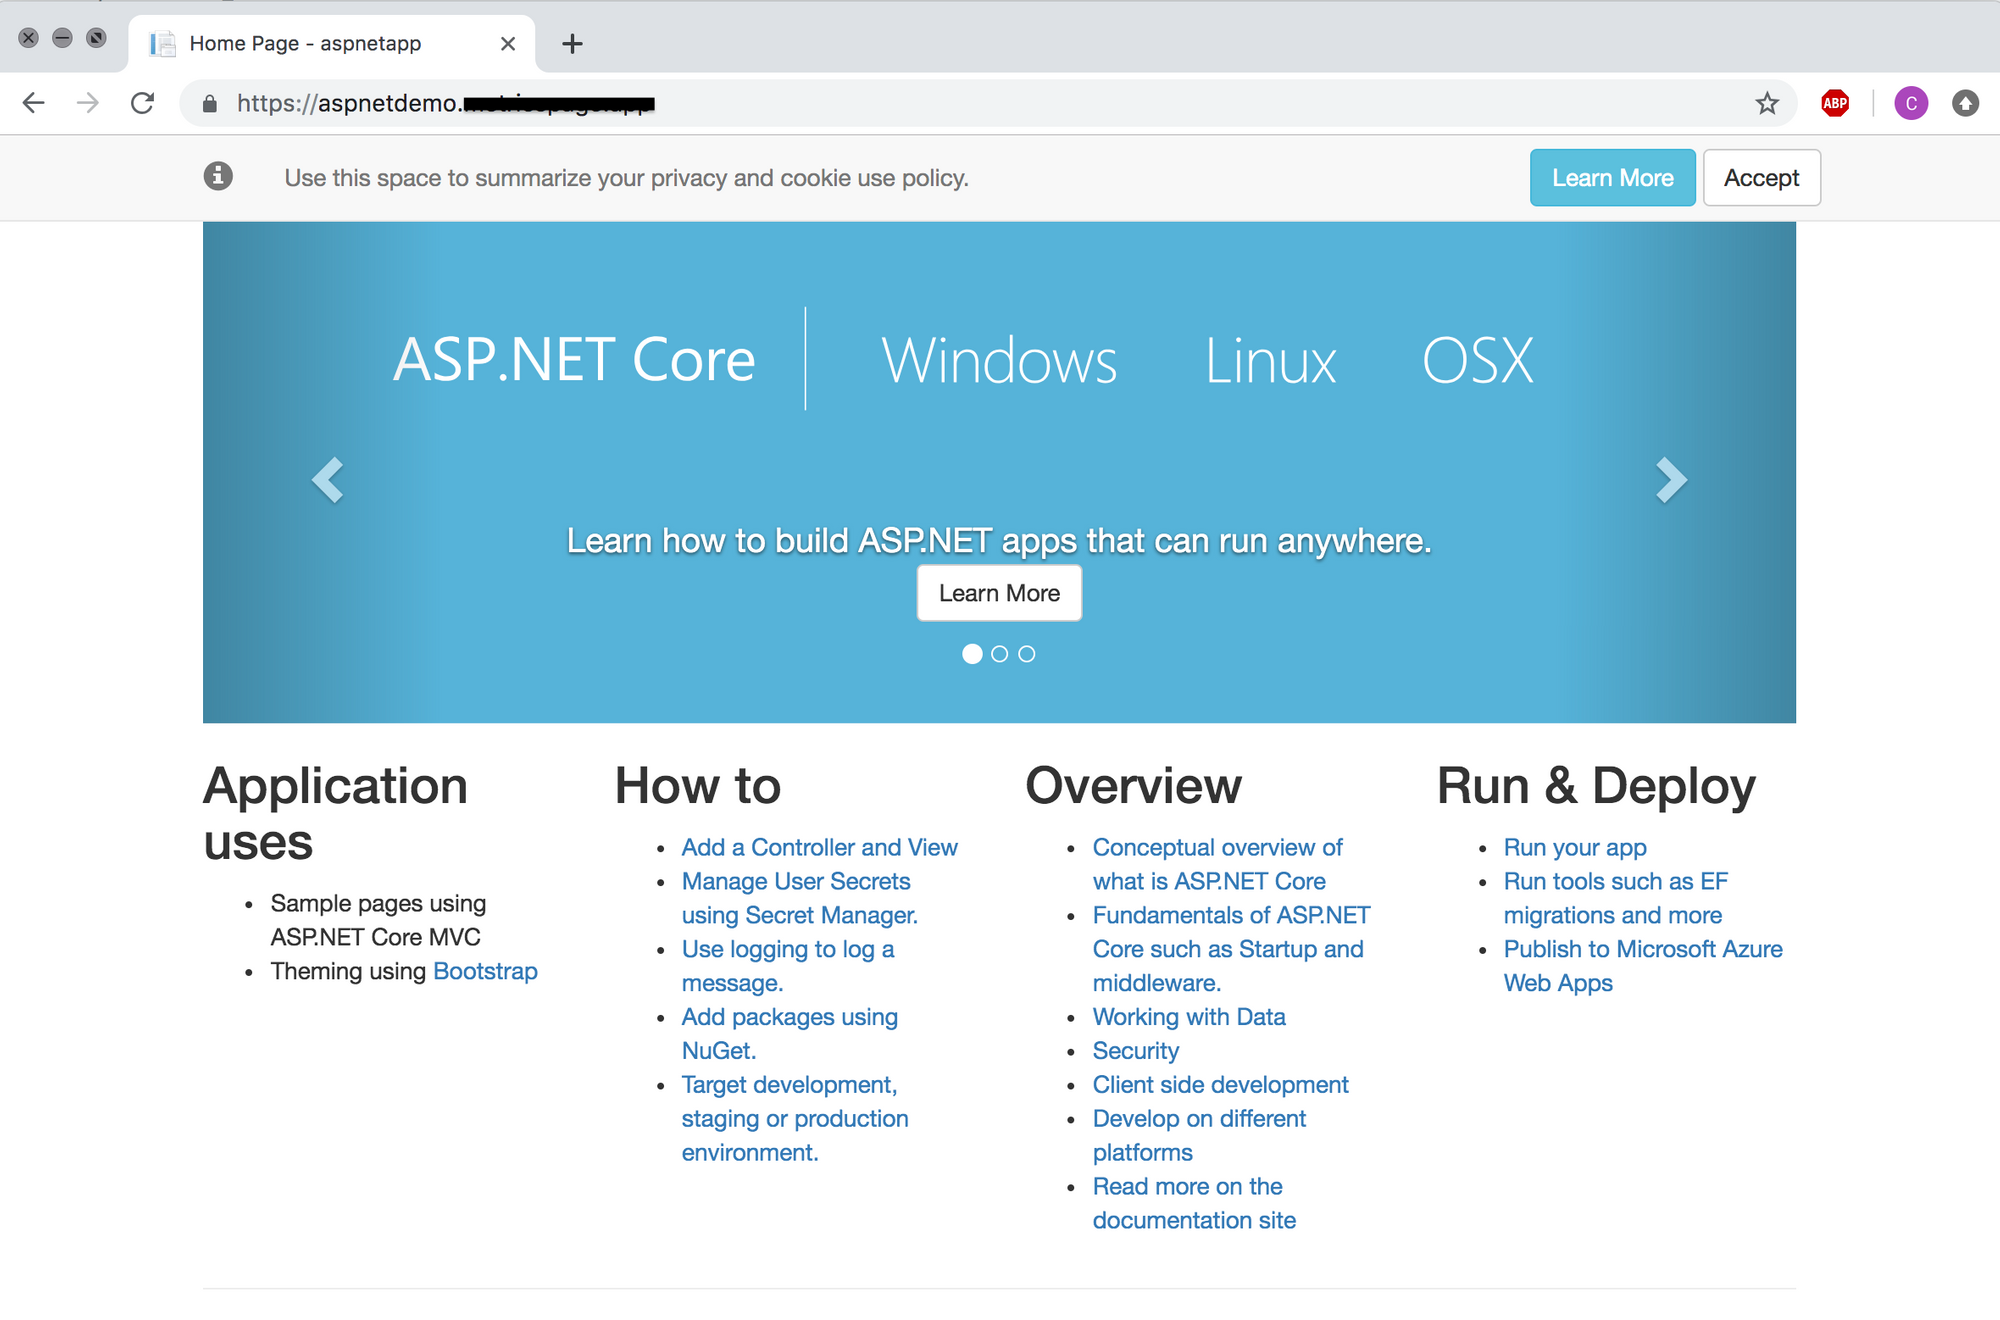
Now, if we launch https://aspnetdemo.yourdomain.com we should see something like this:
Configuring DNS and CAA
I have added this section to help and assist with setting up DNS records for those that are relatively new in this area.
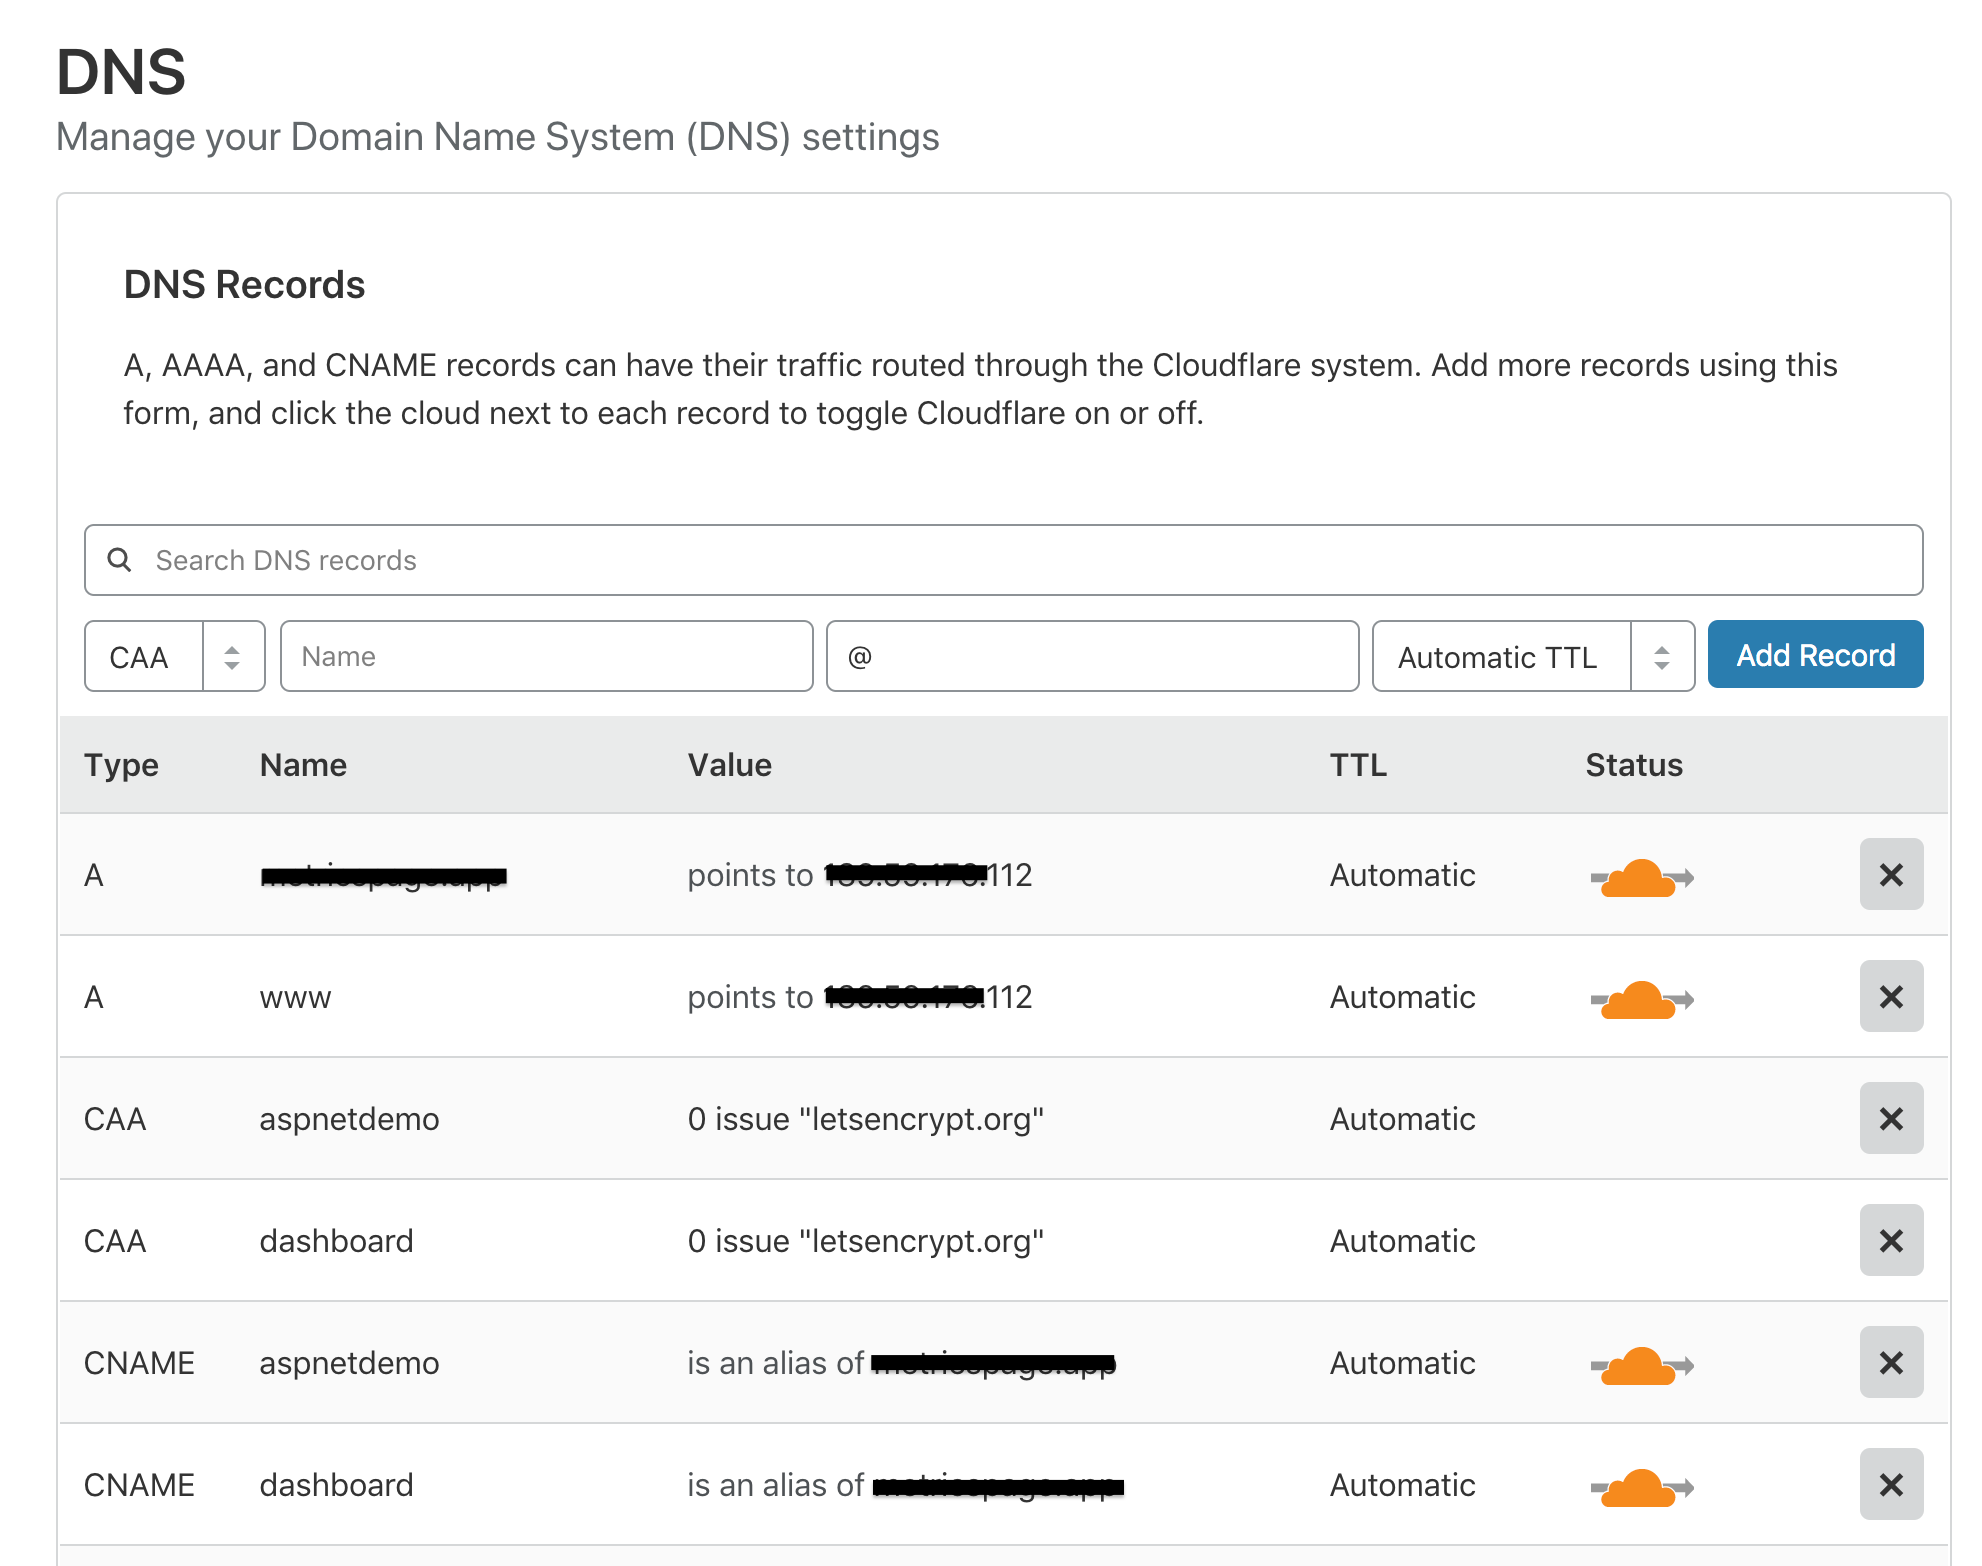
For Let’s Encrypt to work and in this example, the following DNS entries are required. Below is a summary table of what DNS entries you will need to make in your DNS manager.
I have obscured the A records of the ip addresses, but these should reflect the ip address of your desired hosted machine.
| Type | Name | Value |
|---|---|---|
A | yourdomain.com | xxx.xxx.xxx.112 |
A | www | xxx.xxx.xxx.112 |
CNAME | dashboard | @ |
CNAME | aspnetdemo | @ |
CAA | dashboard | letsencrypt.org |
CAA | aspnetdemo | letsencrypt.org |
I’m using Cloudflare and here is a screenshot:
Summary
In this post I described how to setup Traefik as a reverse proxy with a domain name and SSL enabled with Let’s Encrypt. I also launched a sample ASP.NET Core dockerized web app to demonstrate how Traefik is able to route traffik to the web application.
In my opinion this is by far easier than using Nginx and Nginx proxy companion to generate and renew SSL certificates.
Once you have the template files setup as shown above, it can be easily replicated for other web applications with minor adjustments.