
I’m sure you have come across web and mobile applications where they offer social logins such as Google, Facebook, Twitter and many more. This is great, as its one less sign up and login you have to remember. It also reduces the friction of signing up.
It’s especially great if you can incorporate them into your own applications. The main benefit of this is that it lowers the barrier of entry for people registering to use your product or service. If the potential customer or user has the social login that you support, the more likely they will try the product or service.
With the introduction of ASP.NET Core 2.X, it already comes bundled with Google, Twiter and Facebook authentication. With the addition of ASPNET Contrib one can incorporate other various social logins such as Slack, BitBucket and more with a few lines of code.
Summary
In this post, I will describe how to use ASP.NET Core and with the help of a very helpful library provided by ASPNET Contrib and the many people who have contributed to the project to enable integration with popular social logins.
I’m not going to go into depth of what OAuth is, which is the underlying standard which makes it all possible. But, I will be going through how to integrate GitHub, Google and Slack as examples.
For demonstration purposes, I have omitted general good practices such as putting settings in config etc to avoid confusion and to make things clearer.
Full source code can be found in my GitHub repository.
Quick intro to OAuth
Feel free to skip this section if you are familiar with OAuth and just want to get integrating.
On a very high-level, OAuth is an open and agreed standard or workflow where it allows delegation of authorization to a provider. Providers such as Google, Facebook, Twitter are popular examples. Once successfully authorized, the provider will redirect back to your app with an access token and that will be exchanged with an authorization token. The benefit of this is that the user can use their existing username and password, with for instance Google, and you don’t have to handle or process their password. The OAuth flow handles this.
If you would like to read more about OAuth, Digital Ocean has a good introduction to OAuth 2. StackOverflow also has a good explanation.
Prepare and Enable Authentication in ASP.NET Core
If you don’t have an ASP.NET Core project handy, feel free to create one. In my examples, I am using ASP.NET Core 2.1.
In the Startup.cs class, add basic authentication in the ConfigureServices method as shown below.
public void ConfigureServices(IServiceCollection services)
{
    services.Configure<CookiePolicyOptions>(options =>
    {
        // This lambda determines whether user consent for non-essential cookies is needed for a given request.
        options.CheckConsentNeeded = context => true;
        options.MinimumSameSitePolicy = SameSiteMode.None;
    });

    // Add Cookie settings
    services.AddAuthentication(options =>
    {
        options.DefaultSignInScheme = CookieAuthenticationDefaults.AuthenticationScheme;
        options.DefaultAuthenticateScheme = CookieAuthenticationDefaults.AuthenticationScheme;
        options.DefaultChallengeScheme = CookieAuthenticationDefaults.AuthenticationScheme;
    });
}
Next, we need to tell ASP.NET Core to use authentication as well as the cookie policy. To do this, we need to add the following in the Configure method in the Startup.cs class.
public void Configure(IApplicationBuilder app, IHostingEnvironment env)
{
...

    // Enable authentication
    app.UseCookiePolicy();
    app.UseAuthentication();

...

    app.UseMvc();
}
Now we have prepared ASP.NET Core with authentication, we can move onto one of the following social login integrations below. Feel free to jump to the relevant section. They are independent in implementations.
Sign in with GitHub
In this section, I will describe the steps in order to integrate “Sign in” with GitHub.
Register an OAuth application with GitHub
First, we need to create an OAuth application on GitHub. GitHub have a very well written document on creating an OAuth app.
The options should be self explanatory, however, the most important setting is the Authorization callback URL. This needs to be set so the path is /signin-github. This is the default callback URL segment set by GitHub authentication provider supplied in the in AspNet.Security.OAuth.GitHub nuget package which we will be using in a moment. In my example, it will be https://localhost:44342/signin-github.
Here are the settings I am using for my example:
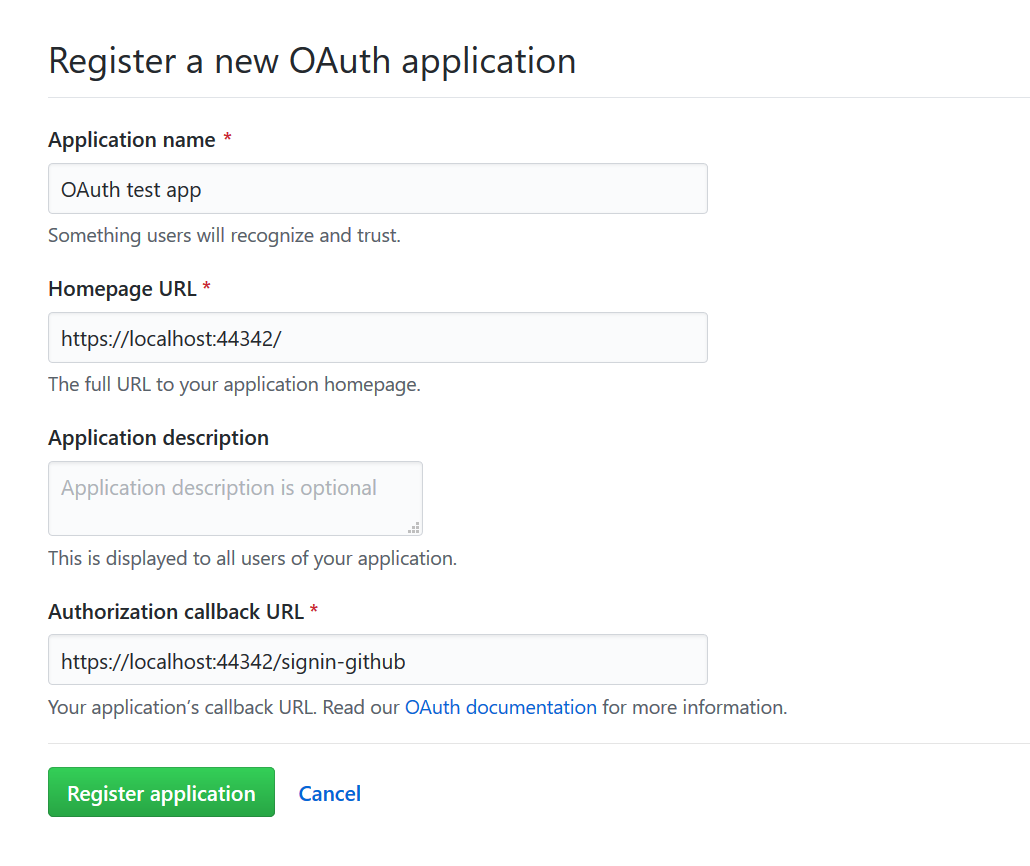
Once you’re happy, click on Register application. You can always modify them again later.
You should now see something like this:
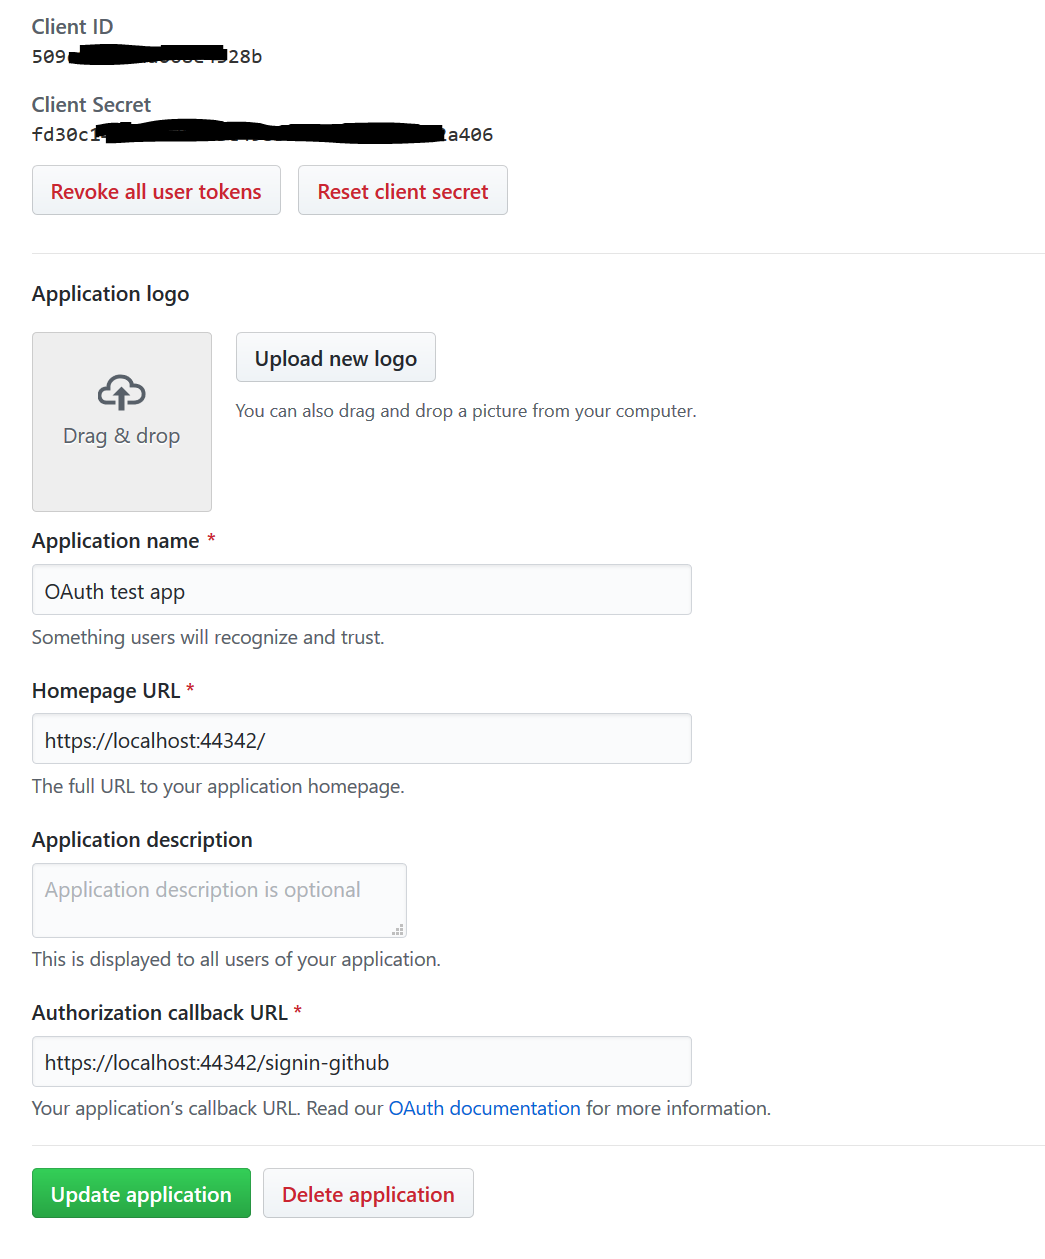
Be sure to make a note of the Client ID and Client Secret.
Add GitHub Authentication in the Startup class
- Install the OAuth GitHub nuget package
Install-Package AspNet.Security.OAuth.GitHub -Version 2.0.1
- Add GitHub authentication in ASP.NET Core.
In
Startup.csuse theAddGitHubextension method in theConfigureServicesmethod as shown below:
using Microsoft.AspNetCore.Authentication.Cookies;
using Microsoft.AspNetCore.Authentication.OAuth;

...

public void ConfigureServices(IServiceCollection services)
{
    ...

    // Add Cookie settings
    services.AddAuthentication(options =>
        {
            options.DefaultSignInScheme = CookieAuthenticationDefaults.AuthenticationScheme;
            options.DefaultAuthenticateScheme = CookieAuthenticationDefaults.AuthenticationScheme;
            options.DefaultChallengeScheme = CookieAuthenticationDefaults.AuthenticationScheme;
        })
        // Add Cookie settings
        .AddCookie(CookieAuthenticationDefaults.AuthenticationScheme, options =>
        {
            options.LoginPath = "/account/login";
            options.LogoutPath = "/account/logout";
            options.SlidingExpiration = true;
        })
        // Add GitHub authentication
        .AddGitHub("Github", options =>
        {
            options.ClientId = ""; // client id from registering github app
            options.ClientSecret = ""; // client secret from registering github app
            options.Scope.Add("user:email"); // add additional scope to obtain email address
            options.Events = new OAuthEvents
            {
                OnCreatingTicket = OnCreatingGitHubTicket()
            }; // Event to capture when the authentication ticket is being created
        });

    ...
}
The .AddGitHub extensions method has a few options that need to be set such as the ClientId and ClientSecret.
Also, to demonstrate additional scopes, I have requested for the user’s email. For additional scopes that GitHub support, feel free to check them out at GitHub.
- Adding authentication events (optional) This step is actually optional. However, its helpul if for instance you need to save some of these details into your system.
private static Func<OAuthCreatingTicketContext, Task> OnCreatingGitHubTicket()
{
    return async context =>
    {
        var fullName = context.Identity.FindFirst("urn:github:name").Value;
        var email = context.Identity.FindFirst(ClaimTypes.Email).Value;

        //Todo: Add logic here to save info into database

        // this Task.FromResult is purely to make the code compile as it requires a Task result
        await Task.FromResult(true);
    };
}
Add the “Sign in with GitHub” Button
Now for some markup. Add a link that will be the trigger for signing in with GitHub. A simplified link is shown below:
<a asp-action="GithubLogin" asp-controller="Account" role="button">
        Sign in with GitHub
</a>
Here, the link simply points to a MVC Controller Action. Nothing special here.
Now, create the corresponding Controller and Action as shown below:
using Microsoft.AspNetCore.Authentication;
using Microsoft.AspNetCore.Mvc;

...

public class OAuthController : Controller
{
    [HttpGet]
    [Route("/oauth/github")]
    public IActionResult GithubLogin()
    {
        return Challenge(new AuthenticationProperties{ RedirectUri = "/Account" }, "Github");
    }
}
The Route /oauth/github can actually be anything you like. It is not fixed. Also, the RedirectUri property that has been set to /Account. This is the url in my exmaple of where I want the app to redirect when the authentication is successful.
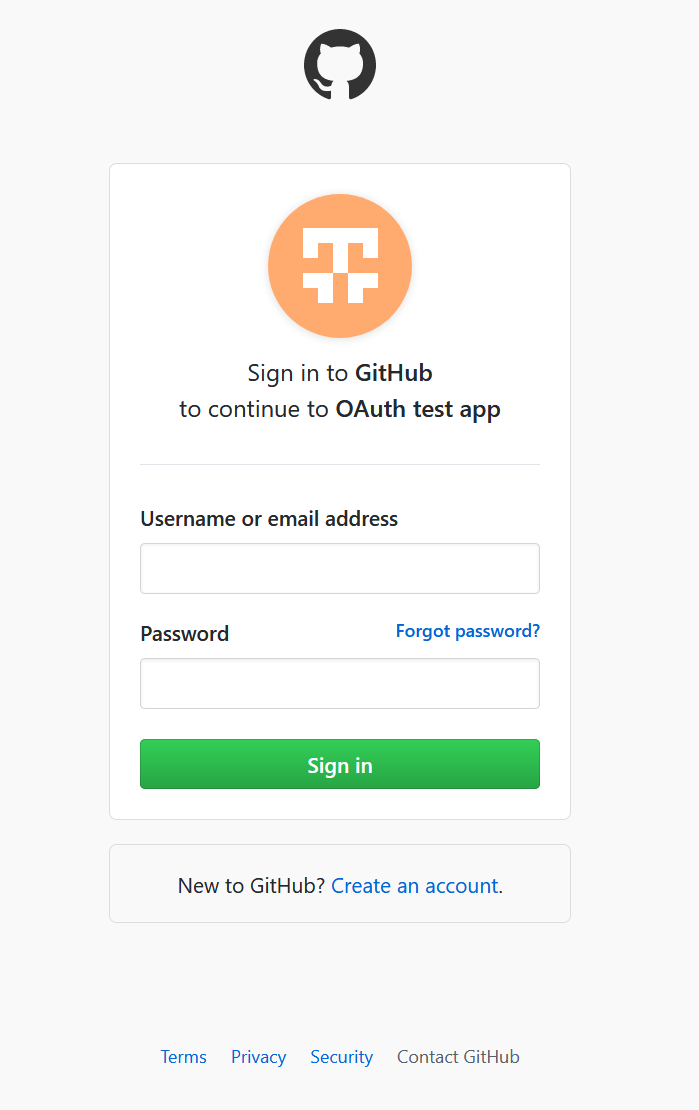
Testing “Sign in with GitHub” Works
To ensure it works, when clicking on the button, it should redirect to GitHub and you should see something like this:
Sign in with Google
Google+ was the general method of implementing “Sign in with Google”. Unfortunately Google have sunset Google+ and the Google+ APIs are going along with it. However, there is an alternative method, which I will outline below. You can find more details about the Google+ shutdown in the Google docs.
Register an OAuth application with Google
- Go to Integrating Google Sign-In into your web app in order to create an OAuth app.
- Click on Configure a Project. You may be asked to sign in.
- Once the Configure a project for Google Sign-in dialog box appears, either create a new project a select an existing one you may have.
- In the Configure your OAuth client, select Web Server.
- In the Authorized redirect URIs be sure to have the path of
/signin-google. In my example, it will behttps://localhost:44342/signin-google. Here’s what it looks like:
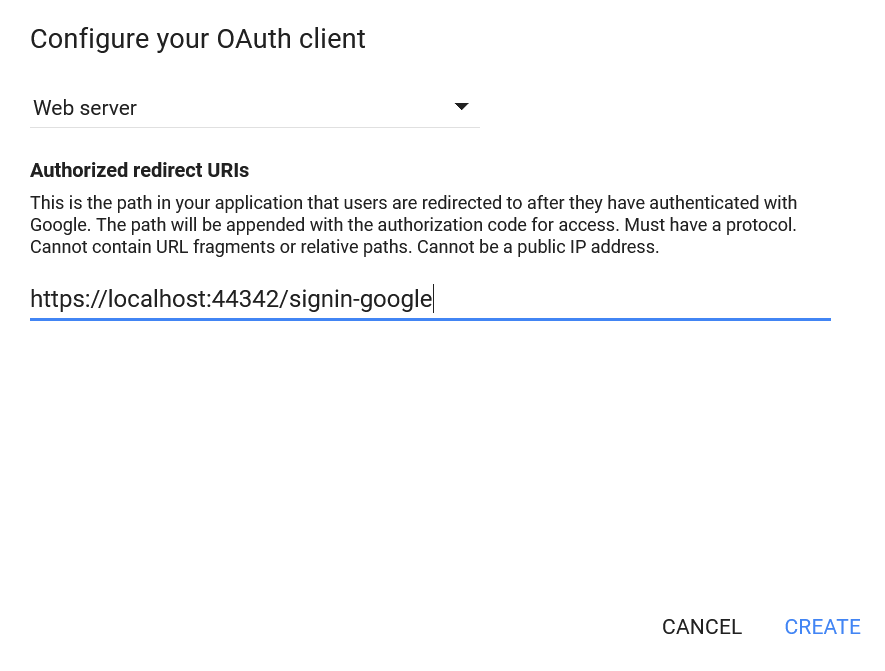
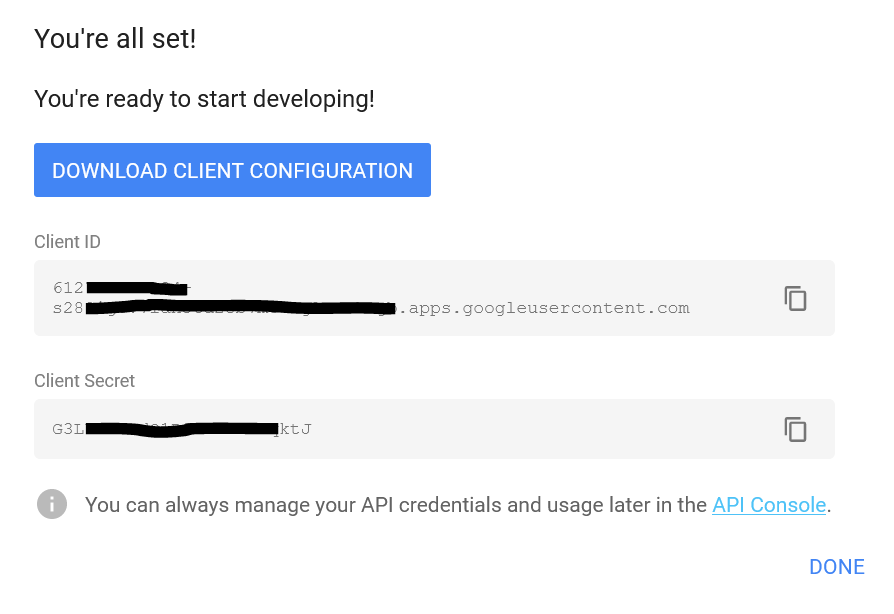
- Click on Create and you should be provided a Client ID and Client Secret as shown below. Be sure to make a note of this.
Add Google Authentication in the Startup class
- Add Google authentication in ASP.NET Core.
In the
Startup.csclass, use theAddGoogleextension method in theConfigureServicesmethod as shown below. Be sure to add the Client ID and Client Secret in the previous step. As mentioned before, since Google has shutdown Google+ API which was previously used to enable the ability to “Sign in with Google”, there are a few additional requirements for ASP.NET Core 2.X. Further details can be found in this Github issue
You may also notice that I have set the options.Events. This is optional.
public void ConfigureServices(IServiceCollection services)
{
    services.Configure<CookiePolicyOptions>(options =>
    {
        // This lambda determines whether user consent for non-essential cookies is needed for a given request.
        options.CheckConsentNeeded = context => true;
        options.MinimumSameSitePolicy = SameSiteMode.None;
    });

    // Add Cookie settings
    services.AddAuthentication(options =>
        {
            options.DefaultSignInScheme = CookieAuthenticationDefaults.AuthenticationScheme;
            options.DefaultAuthenticateScheme = CookieAuthenticationDefaults.AuthenticationScheme;
            options.DefaultChallengeScheme = CookieAuthenticationDefaults.AuthenticationScheme;
        })
        // Add Cookie settings
        .AddCookie(CookieAuthenticationDefaults.AuthenticationScheme, options =>
        {
            options.LoginPath = "/account/login";
            options.LogoutPath = "/account/logout";
            options.SlidingExpiration = true;
        })
        // Add Google Authentication
        .AddGoogle("Google", options =>
            {
                options.ClientId = "";
                options.ClientSecret = "";
                options.UserInformationEndpoint = "https://www.googleapis.com/oauth2/v2/userinfo";
                options.ClaimActions.Clear();
                options.ClaimActions.MapJsonKey(ClaimTypes.NameIdentifier, "id");
                options.ClaimActions.MapJsonKey(ClaimTypes.Name, "name");
                options.ClaimActions.MapJsonKey(ClaimTypes.GivenName, "given_name");
                options.ClaimActions.MapJsonKey(ClaimTypes.Surname, "family_name");
                options.ClaimActions.MapJsonKey("urn:google:profile", "link");
                options.ClaimActions.MapJsonKey(ClaimTypes.Email, "email");
                options.Events = new OAuthEvents
                {
                    OnCreatingTicket = OnCreatingGoogleTicket()
                }; // Event to capture when the authentication ticket is being created
            });

}
- Adding authentication events (optional)
As shown above, I have added a
OAuthEvents. This is useful if you need to override or capture some of the user’s information. The code below shows an example of how one can capture this information.
private static Func<OAuthCreatingTicketContext, Task> OnCreatingGoogleTicket()
{
    return async context =>
    {
        var firstName = context.Identity.FindFirst(ClaimTypes.GivenName).Value;
        var lastName = context.Identity.FindFirst(ClaimTypes.Surname)?.Value;
        var email = context.Identity.FindFirst(ClaimTypes.Email).Value;


        //Todo: Add logic here to save info into database

        // this Task.FromResult is purely to make the code compile as it requires a Task result
        await Task.FromResult(true);
    };
}
Add the “Sign in with Google” Button
Now we can add some markup. I have a simple GoogleLogin action in the OAuthController
<a asp-action="GoogleLogin" asp-controller="OAuth">
    Sign in with Google
</a>
Here is the code for the Controller Action. The route /oauth/google can be anything you wish and the RedirectUri used here is set to Account. This means that on a successful authentication from Google, it will redirect to /Account.
using Microsoft.AspNetCore.Authentication;
using Microsoft.AspNetCore.Mvc;

...

public class OAuthController : Controller
{

    [HttpGet]
    [Route("/oauth/google")]
    public IActionResult GoogleLogin()
    {
        return Challenge(new AuthenticationProperties{ RedirectUri = "Account" }, "Google");
    }

}
Testing “Sign in with Google” Works
With all the above, if all goes well, you should see something like this.

Sign with Slack
With Slack, we need to create a Slack App. Slack also have some great documentation on how to integrate sign in with Slack and its well worth a read.
Register an OAuth application with Slack
In order to enable “Sign in with Slack”, a Slack App needs to be created.
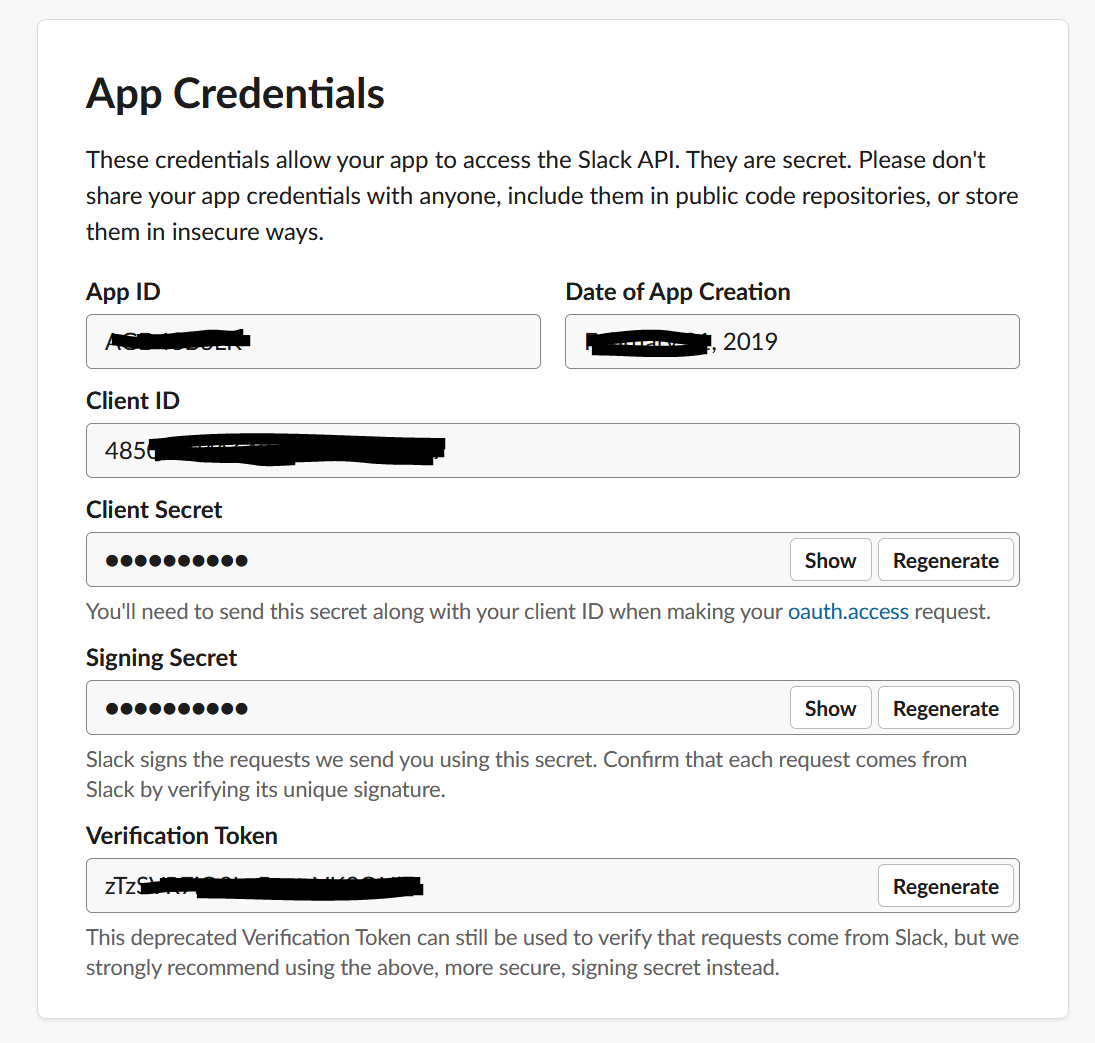
Once a Slack app has been created, be sure to make a note of the Client ID and Client Secret.
You should be able to find it Basic Information under the Settings section, and it should look something like this:
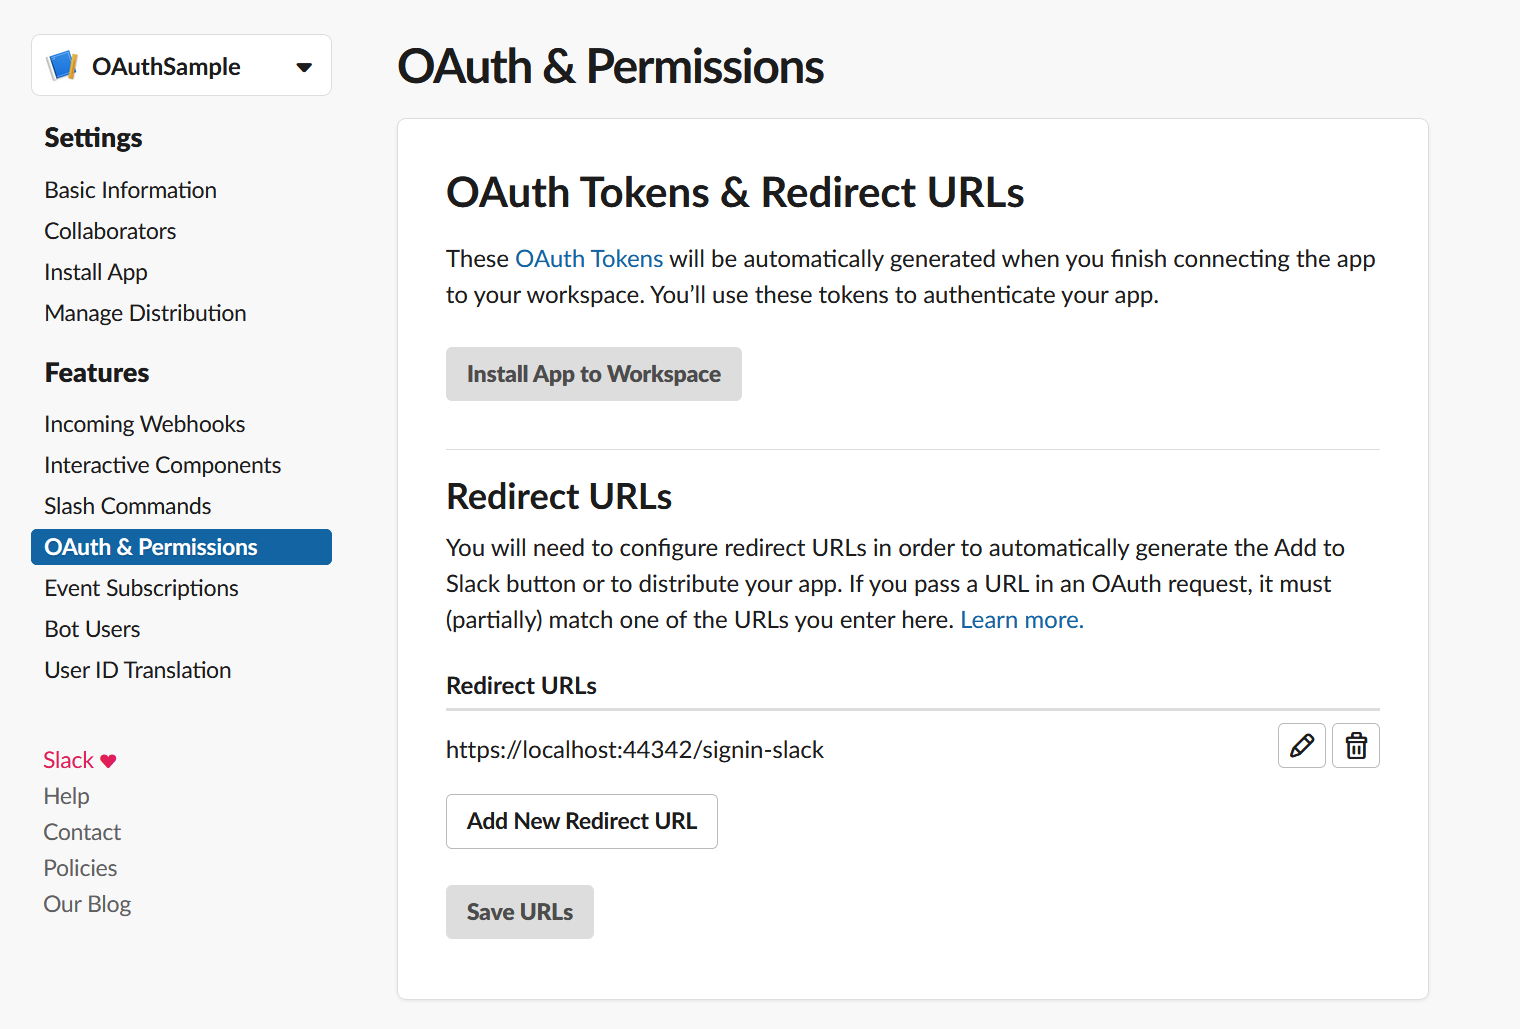
Next, in the OAuth and Permissions section, add a redirect url which should be something like this https://localhost:44342/signin-slack
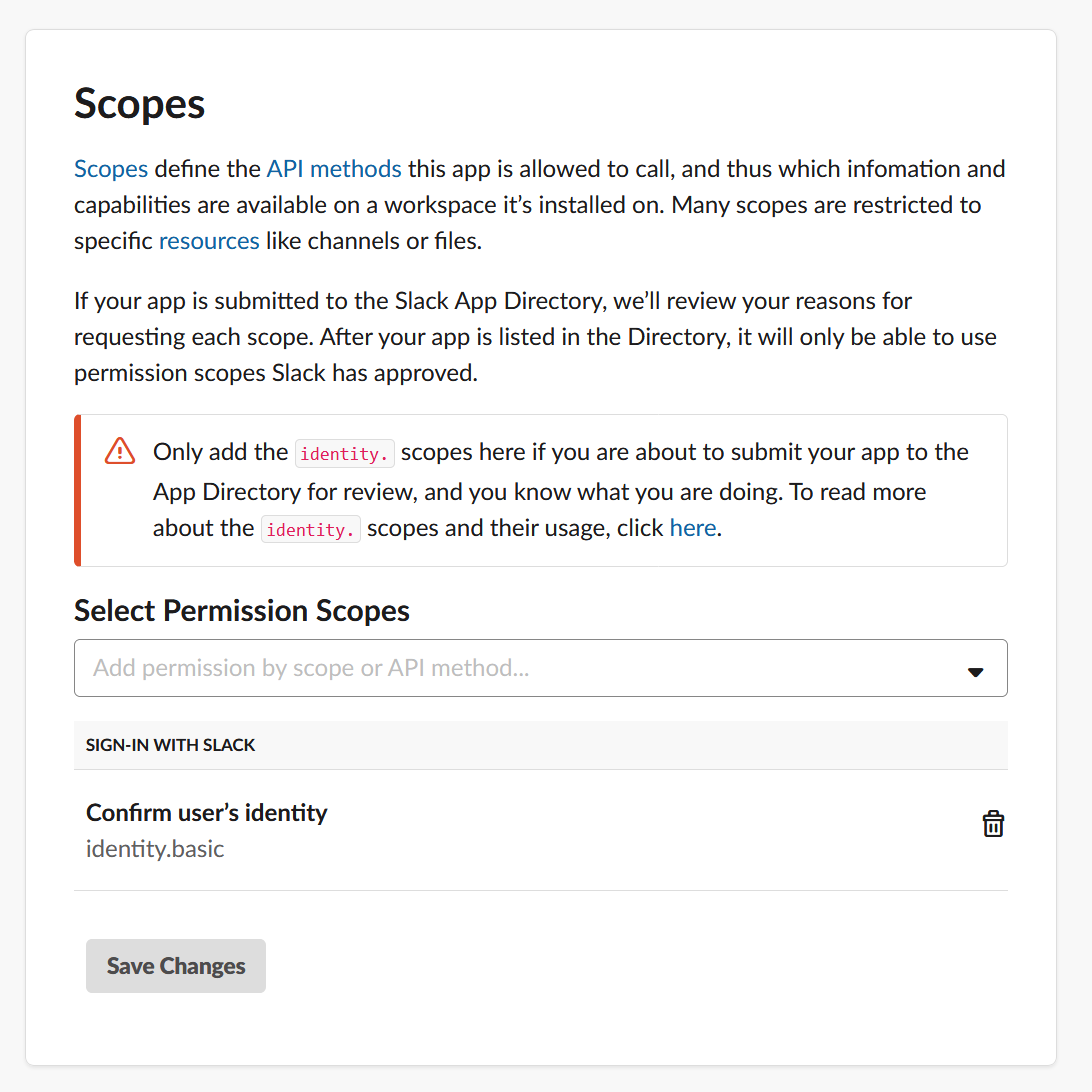
Just beneath the Redirect URLs section, the Scope section can be found. The minimum scope that needs to be added is identity.basic. Be sure to add this as shown below:
Add Slack Authentication in the Startup class
- Install the OAuth Slack nuget package.
Install-Package AspNet.Security.OAuth.Slack -Version 2.0.1
- Add Slack authentication in ASP.NET Core
Make use of the
AddSlackextension method in theConfigureServicesmethod in theStartup.csclass. Again, I am making use of theOAuthEventsto enable additional capturing of data on successful authentication. This is of course optional.
public void ConfigureServices(IServiceCollection services)
{
    services.Configure<CookiePolicyOptions>(options =>
    {
        // This lambda determines whether user consent for non-essential cookies is needed for a given request.
        options.CheckConsentNeeded = context => true;
        options.MinimumSameSitePolicy = SameSiteMode.None;
    });

    // Add Cookie settings
    services.AddAuthentication(options =>
        {
            options.DefaultSignInScheme = CookieAuthenticationDefaults.AuthenticationScheme;
            options.DefaultAuthenticateScheme = CookieAuthenticationDefaults.AuthenticationScheme;
            options.DefaultChallengeScheme = CookieAuthenticationDefaults.AuthenticationScheme;
        })
        // Add Cookie settings
        .AddCookie(CookieAuthenticationDefaults.AuthenticationScheme, options =>
        {
            options.LoginPath = "/account/login";
            options.LogoutPath = "/account/logout";
            options.SlidingExpiration = true;
        })
        // Add Slack Authentication
        .AddSlack("Slack", options => {

            options.ClientId = "";
            options.ClientSecret = "";
            options.Events = new OAuthEvents {OnCreatingTicket = OnCreatingSlackTicket()};
        });


}
- Adding authentication events (optional)
In order to obtain information from the scope or claims, we need to add an
OAuthEventas shown below. The benefit of this is that you can save this information in a database to simulate user accounts.
private static Func<OAuthCreatingTicketContext, Task> OnCreatingSlackTicket()
{
    return async context =>
    {
        var fullName = context.Identity.FindFirst(ClaimTypes.Name).Value;

        //Todo: Add logic here to save info into database

        // this Task.FromResult is purely to make the code compile as it requires a Task result
        await Task.FromResult(true);
    };
}
Add the “Sign in with Slack” Button
Slack do have a button generator which can be found in the sign in with Slack documentation. However, since we are using the OAuth Nuget package we will have to configure it the following way.
A simple link that directs to a Controller Action is all that is required.
<a asp-action="SlackLogin" asp-controller="OAuth">
    Sign in with Slack
</a>
Below is the corresponding Controller Action. The route /oauth/slack is not fixed and it can be anything you like. The RedirectUri setting which is set to Account tells ASP.NET Core to redirect to Account on a successful authentication with Slack.
using Microsoft.AspNetCore.Authentication;
using Microsoft.AspNetCore.Mvc;

...
    public class OAuthController : Controller
    {
        [HttpGet]
        [Route("/oauth/slack")]
        public IActionResult SlackLogin()
        {
            return Challenge(new AuthenticationProperties{ RedirectUri = "Account" }, "Slack");
        }
}
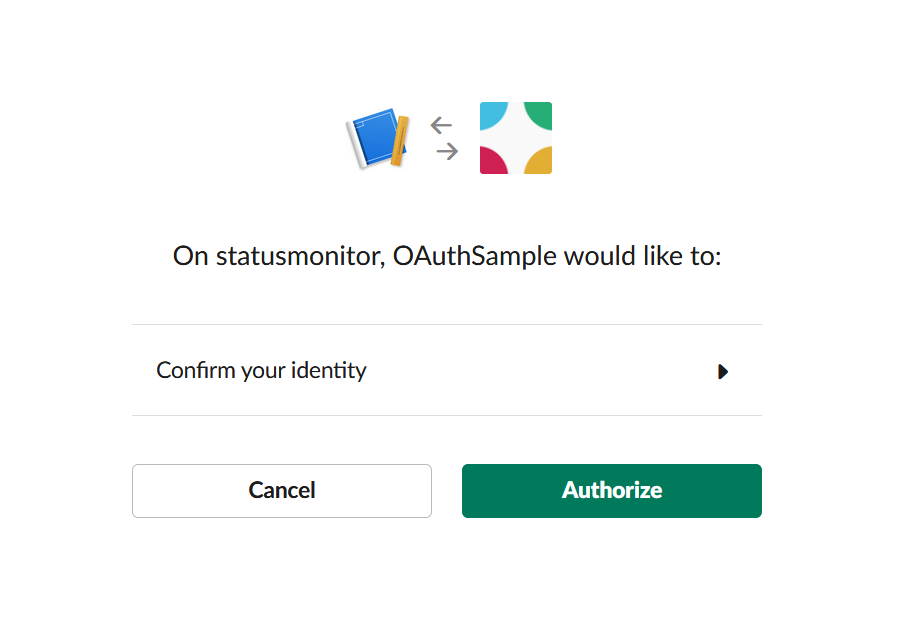
Testing “Sign in with Slack” Works
Summary
I have demonstrated how to incorporate social signin’s such as GitHub, Google and Slack using ASP.NET Core 2.1 and using OAuth providers from ASPNET Contrib without too much code.
You can view the full source code implementation from my GitHub repository - OAuthSample
If you would like to know what providers are supported, just checkout the available providers in the source code from aspnet-contrib in GitHub.
One thing to consider is that you may need to create multiple OAuth apps for each provider. Why? Well, since OAuth apps work on declaring a redirect url such as https://localhost:44342/signin-github in most cases, in a production environment, the hostname will be different, e.g. https://mydomain.com/signin-github. It might add additional labour, but it’s well worth it to ensure that it works on various environments.